
One of my favorite holiday traditions is decorating the Christmas tree. I’m not sure if it’s because of the immense amount of joy that I experience when it’s finally finished and we light the angel, or if it’s the bonding and laughter that develops as the entire family gets together for this special event. Either way, Christmas trees hold a warm place in my heart.
Throughout the years, I have slowly gone from purchasing the least-expensive store bought ornaments for our Christmas tree to selecting unique keepsake ornaments, and finally to making our own hand-made bows and other one-of-a-kind items.
 Now I’ll admit, in the beginning my hand-made bows looked more like a kindergartener’s worst shoelace tying experiment than Christmas tree decorations. I routinely selected poor quality ribbon, fumbled with various ideas that ended up resembling fisherman’s knots or something from my son’s cub scout book, and would finally give up and just tie some ribbon to a wire. It actually wasn’t until my teenaged daughter volunteered to make an assortment of fancy hair-bows for her cheerleading squad that I finally discovered my hidden bow making talent.
The Art of Making Bows for Christmas Trees with Wired Ribbon
It’s absolutely essential that you gather the correct equipment before you begin your bow-making adventure. Items you will need include:
A variety of quality wired ribbon. I prefer to select ribbons in festive colors or with holiday patterns. There is a wide variety of ribbon available these days, from fabric to foil, and you can choose the ones that suit your own personal taste.
Floral wire, string, or a staple gun, depending on your level of patience and skill. While I personally prefer the floral wire because it is easy to apply by myself if need be, a staple gun comes in really handy when my patience runs out and the bow becomes in danger of being tossed out the window. String works best for partner bows, unless of course you were born with four hands.
Now that you have all of your equipment ready, it is time to take a deep breath, sip some cocoa, and dig in.
Decide on the size of your bow. Remember that each loop that you make will be equal to approximately half the bow size, so measure accordingly. Beginning with the end of your ribbon, make a loop the size you’ve selected, and scrunch and twist the center where the end piece overlaps the rest of the ribbon. Create another loop of equal size on the opposite side of your initial loop, and once again scrunch and twist.
Continue adding loops that are somewhat opposite each other and scrunch and twist the center until you reach the design you are looking for. Don’t worry if your bow resembles a nest of messy ribbon at this point. We’ll add finishing touches in the end. Right now, just concentrate on the actual assembly of the piece.
Add your center loop and fasten the entire center with wire, a staple gun, or string.
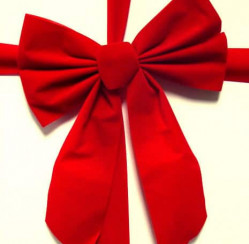
Shape your bow to perfection and voila! You’ve just made a beautiful bow.
These bows are perfect for Christmas trees, wreaths, and other holiday decorations as well.
Tell us about your bow making adventure! What other homemade decorations does your family make?
Creative Commons Attribution: Permission is granted to repost this article in its entirety with credit to ChristmasGifts.com and a clickable link back to this page.